国外VPS服务器之CyberPanel可视化控制面板安装教程篇
自从宝塔面板需要各种登录验证后,小编测试国外VPS服务器安装面板基本不用宝塔了,于是今天记录一下pacificrack的新款VPS安装CyberPanel过程和基本的CyberPanel使用图文教程。
CyberPanel 是基于 (Open)LiteSpeed 开发的多用户管理的控制面板,用户可以将 CyberPanel 与 WHMCS 整合实现自动开通虚拟主机。CyberPanel 在功能和易用方面已经非常完善了,功能上和 DirectAdmin 面板类似,并逐步追赶 Plesk、CPanel 能商业化面板。
CyberPanel系统要求
Centos 7.x,Centos 8.x,Ubuntu 18.04,Ubuntu 20.04
Python 3.x
1024MB或以上Ram。
10GB磁盘空间。
CyberPanel VS CyberPanel Ent!
CyberPanel带有两个版本,一个简称为CyberPanel,另一个称为CyberPanel Ent。CyberPanel随附OpenLiteSpeed,并且对于无限数量的域和辅助进程完全免费。
但是,CyberPanel Ent随LiteSpeed Web Server Enterprise一起提供,它可免费使用1个域。如果您需要多个域,则需要购买许可证。
您可以了解有关OpenLiteSpeed与LiteSpeed Web Server Enterprise之间的区别的更多信息, 并确定最适合您的需求的内容。安装完成后,CyberPanel和CyberPanel Ent在前端可以100%相同地工作,除了一个后端运行OpenLiteSpeed,另一个运行LiteSpeed Web Server Enterprise。
安装CyberPanel
安装CyberPanel很容易,如果您使用的是DigitalOcean,Google云,Amazon AWS,微软云,阿里云,Linode,单击即可安装CyberPanel。其它服务商可使用如下代码开始安装:
sh <(curl https://cyberpanel.net/install.sh || wget -O - https://cyberpanel.net/install.sh) 接下来:
- CyberPanel Installer v2.1.1
- 1. Install CyberPanel.(安装CyberPanel)
- 2. Addons and Miscellaneous(附加组件和杂项)
- 3. Exit.(退出)
- Please enter the number[1-3]: 1
- CyberPanel Installer v2.1.1
- RAM check : 92/1999MB (4.60%)
- Disk check : 2/26GB (9%) (Minimal 10GB free space)
- 1. Install CyberPanel with OpenLiteSpeed.(使用OpenLiteSpeed安装CyberPanel)
- 2. Install Cyberpanel with LiteSpeed Enterprise.(使用LiteSpeed Enterprise安装Cyberpanel)
- 3. Exit.
- Please enter the number[1-3]: 1
- Install Full service for CyberPanel? This will include PowerDNS, Postfix and Pure-FTPd.(安装CyberPanel的全套服务?这将包括PowerDNS、Postfix和纯FTPd)
- Full installation [Y/n]: y
- Full installation selected...
- Do you want to setup Remote MySQL? (This will skip installation of local MySQL)(是否要设置远程MySQL?(这将跳过本地MySQL的安装))
- (Default = No) Remote MySQL [y/N]: n
- Local MySQL selected...
- Press Enter key to continue with latest version or Enter specific version such as: 1.9.4 , 2.0.1 , 2.0.2 ...etc
- 2.0.2(按Enter键继续使用最新版本或输入特定版本,如:1.9.4、2.0.1、2.0.2…等2.0.2)
- Set branch name to v2.0.2...
- Please choose to use default admin password 1234567, randomly generate one (recommended) or specify the admin password?(请选择使用默认管理员密码1234567,随机生成一个(推荐)或指定管理员密码?)
- Choose [d]fault, [r]andom or ▼et password: [d/r/s] r
- Admin password will be provided once installation is completed...
- Do you wish to install Memcached process and its PHP extension?(是否要安装Memcached进程及其PHP扩展?)
- Please select [Y/n]: y
- Install Memcached process and its PHP extension set to Yes...
- Do you wish to install Redis process and its PHP extension?(您想安装Redis进程及其PHP扩展吗?)
- Please select [Y/n]: y
- Install Redis process and its PHP extension set to Yes...
- Would you like to set up a WatchDog (beta) for Web service and Database service ?(是否要为Web服务和数据库服务设置监视程序(测试版)?)
- The watchdog script will be automatically started up after installation and server reboot(看门狗脚本将在安装和服务器重新启动后自动启动)
- If you want to kill the watchdog , run watchdog kill
- Please type Yes or no (with capital Y, default Yes):
- Y
上面已经设置完成,点击确认将自动安装所有服务,时间取决于硬件配置,我测试大概用了25分钟左右安装完毕。最终如下图:
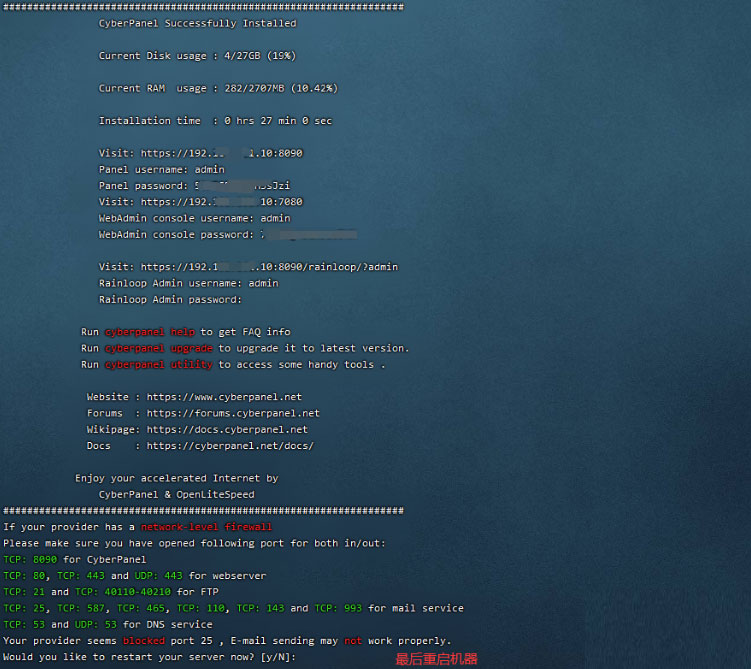
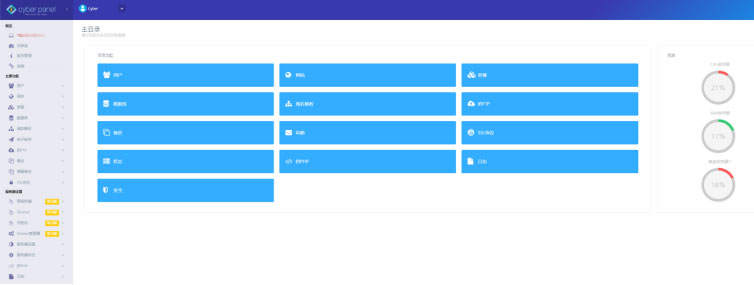
安装到此结束,登录面板: