如何在CentOS 7上安装OpenLiteSpeed Web服务器-开源轻量高性能的建站面板
LiteSpeed是一款可以替换Apache的企业级Web服务器,具有高性能,低资源占用,安全,易用的特点。它支持直接使用Apache的配置文件,可直接使用.htacess,无需额外配置,兼容Mod_Security。因此避免像Nginx那样需要自己写重写规则的麻烦。
而OpenLiteSpeed是LiteSpeed的开源免费版本,除了保留了LiteSpeed轻量、高性能的特性外,它还加入了非常多的“前沿”技术,例如HTTP3/QUIC/TLS1.3/Brotli等都是默认就支持的,而且LiteSpeed Cache 高性能缓存功能可以大大提升PHP的执行效率。
OpenLiteSpeed提供了一个服务器控制面板,这个控制面板可以让实现在线添加虚拟主机、绑定域名、设置端口号等建站操作,对于想要使用LiteSpeed来建站的朋友是一个非常好的平台。

OpenLiteSpeed安装方法
1.1 安装OLS
直接根据你自己的操作系统使用命令安装即可:
- CentOS 5:
- rpm -Uvh http://rpms.litespeedtech.com/centos/litespeed-repo-1.1-1.el5.noarch.rpm
- CentOS 6:
- rpm -Uvh http://rpms.litespeedtech.com/centos/litespeed-repo-1.1-1.el6.noarch.rpm
- CentOS 7:
- rpm -Uvh http://rpms.litespeedtech.com/centos/litespeed-repo-1.1-1.el7.noarch.rpm
- CentOS 8:
- rpm -Uvh http://rpms.litespeedtech.com/centos/litespeed-repo-1.1-1.el8.noarch.rpm
- Debian 7, 8 & Ubuntu 12,14,16,18 :
- wget -O - http://rpms.litespeedtech.com/debian/enable_lst_debian_repo.sh | bash
- For CentOS:
- yum install openlitespeed
- For Debian & Ubuntu:
- apt-get install openlitespeed
1.2 安装PHP
默认的OpenLiteSpeed是安装了PHP7.3,执行以下命令安装PHP 7.3:
- For CentOS:
- yum install epel-release
- yum install lsphp73 lsphp73-common lsphp73-mysql lsphp73-gd lsphp73-process lsphp73-mbstring lsphp73-xml lsphp73-mcrypt lsphp73-pdo lsphp73-imap lsphp73-soap lsphp73-bcmath
- ln -sf /usr/local/lsws/lsphp73/bin/lsphp /usr/local/lsws/fcgi-bin/lsphp5
- For Debian & Ubuntu:
- apt-get install lsphp73
- ln -sf /usr/local/lsws/lsphp73/bin/lsphp /usr/local/lsws/fcgi-bin/lsphp5
想要安装多个PHP的,可以使用以下命令安装(想要哪个版本只要替换一下数字就行):
- apt-get install lsphp74
- ln -sf /usr/local/lsws/lsphp74/bin/lsphp /usr/local/lsws/fcgi-bin/lsphp5
- #If you wish to install an older version such as PHP 5.6, replace lsphp73 to lsphp56.
1.3 安装数据库
执行以下命令安装mariadb数据库。
For CentOS: yum install mariadb-server mariadb-client
For Debian & Ubuntu: sudo apt-get install mariadb-server mariadb-client
执行以下命令对数据库进行安全设置。
mysql_secure_installation
首先,它会询问您MariaDB root密码。由于我们还没有设置,只需按ENTER继续。下一步要求您设置root密码。选择并确认数据库系统的管理密码。
对于其余问题,您只需按Enter即可接受默认建议。这将恢复我们的数据库系统上的一些不安全的设置。
- root@ecs-OA5Ok:~# mysql_secure_installation
- NOTE: RUNNING ALL PARTS OF THIS SCRIPT IS RECOMMENDED FOR ALL MariaDB
- SERVERS IN PRODUCTION USE! PLEASE READ EACH STEP CAREFULLY!
- In order to log into MariaDB to secure it, we'll need the current
- password for the root user. If you've just installed MariaDB, and
- you haven't set the root password yet, the password will be blank,
- so you should just press enter here.
- Enter current password for root (enter for none):
- OK, successfully used password, moving on...
- Setting the root password ensures that nobody can log into the MariaDB
- root user without the proper authorisation.
- You already have a root password set, so you can safely answer 'n'.
- Change the root password? [Y/n] n
- ... skipping.
- By default, a MariaDB installation has an anonymous user, allowing anyone
- to log into MariaDB without having to have a user account created for
- them. This is intended only for testing, and to make the installation
- go a bit smoother. You should remove them before moving into a
- production environment.
- Remove anonymous users? [Y/n] y
- ... Success!
- Normally, root should only be allowed to connect from 'localhost'. This
- ensures that someone cannot guess at the root password from the network.
- Disallow root login remotely? [Y/n] n
- ... skipping.
- By default, MariaDB comes with a database named 'test' that anyone can
- access. This is also intended only for testing, and should be removed
- before moving into a production environment.
- Remove test database and access to it? [Y/n] y
- - Dropping test database...
- ... Success!
- - Removing privileges on test database...
- ... Success!
- Reloading the privilege tables will ensure that all changes made so far
- will take effect immediately.
- Reload privilege tables now? [Y/n] y
- ... Success!
- Cleaning up...
- All done! If you've completed all of the above steps, your MariaDB
- installation should now be secure.
- Thanks for using MariaDB!
重启或者关闭数据库。
systemctl start mariadb 启动MariaDB
systemctl restart mariadb
更改OpenLiteSpeed的默认管理员密码
首先,我们应该更改OpenLiteSpeed的默认管理密码。默认情况下,它设置为“123456”,因此我们应立即修改此值。
要更改密码,请执行以下脚本:
sudo /usr/local/lsws/admin/misc/admpass.sh
您可以为管理帐户选择用户名,也可以通过按ENTER键来接受默认值“admin”。之后,您将必须为管理用户提供一个密码并且验证改密码。请确保选择一个安全性高的密码,因为默认情况下管理登录屏幕对Web是开放的。
二、OpenLiteSpeed面板使用
2.1 测试默认网页和管理界面
OpenLiteSpeed服务器应该已经启动并运行。如果需要启动,停止,重新启动或检查服务器的状态,请使用带有lsws服务名称的标准service命令:
sudo service lsws status
在Web浏览器中,您可以查看OpenLiteSpeed的默认网页。导航到服务器的域名或IP地址,然后指定:8088端口:
http://server_domain_or_IP:8088
您将看到一个页面是默认的OpenLiteSpeed网页,如下所示:
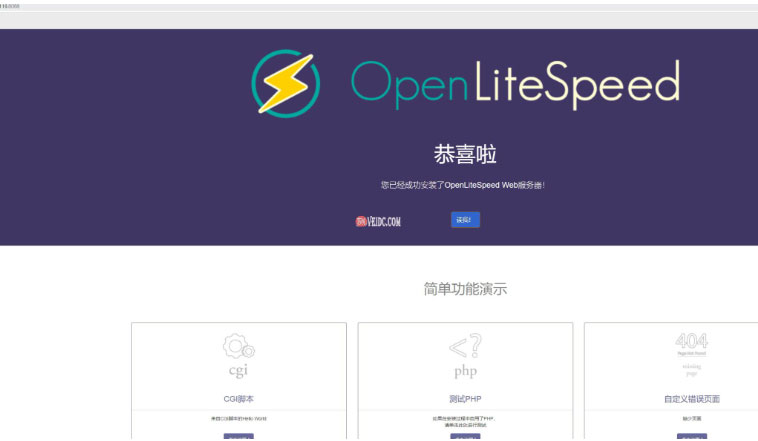
如果不能打开,可能是默认的防火墙开启没有例外端口,以centos 7为例,我们来个简单粗暴的命令就应该可以打开网页了:
systemctl stop firewalld.service
如果单击链接,您应该注意到已经安装并正确配置了许多功能。例如,可以使用示例CGI脚本,启动并运行自定义PHP实例,配置自定义错误页面和身份验证门。点击四处探索一下。
如果您对默认站点感到满意,我们可以继续使用管理界面。在Web浏览器中,使用HTTPS导航到服务器的域名或IP地址,然后指定:7080端口:
https://server_domain_or_IP:7080
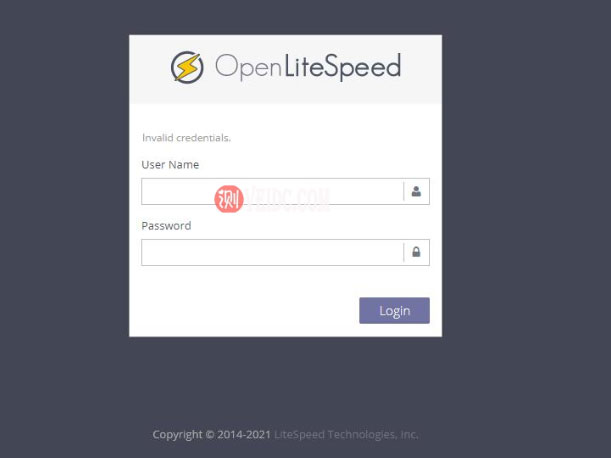
您可能会看到一个页面警告您无法验证来自服务器的SSL证书。由于这是一个自签名证书,这是预期的。点击可用选项以进入该网站(在Chrome中,您必须单击“高级”,然后“继续…”)。
系统将提示您输入刚刚使用该admpass.sh脚本选择的管理名称和密码:
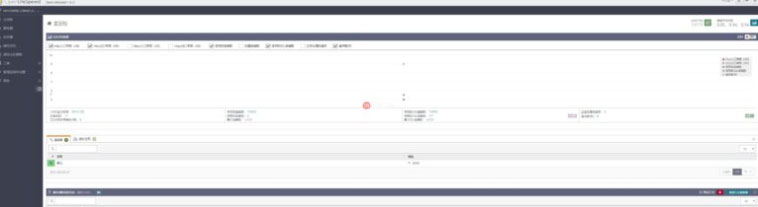
正确验证后,您将看到OpenLiteSpeed管理界面(这个就是OpenLiteSpeed的后台管理面板,主要有主面板、服务器、监听器、虚拟主机、虚拟主机模板、工具、管理控制台设置等。):
三:PHPMyAdmin安装管理
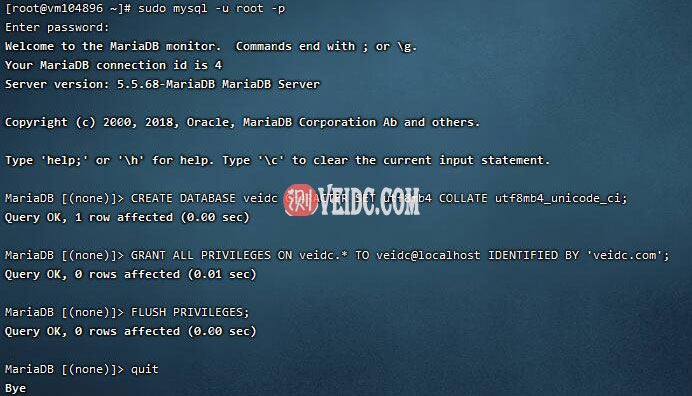
OpenLiteSpeed没有在线的数据库管理PHPMyAdmin,所以管理数据库都比较麻烦,我们可以自己安装一个。使用以下命令登录到你的数据库,创建一个数据库名:veidc,密码为:veidc.com 的数据库。(请替换为你自己的)
- sudo mysql -u root -p
- CREATE DATABASE veidc CHARACTER SET utf8mb4 COLLATE utf8mb4_unicode_ci;
- GRANT ALL PRIVILEGES ON veidc.* TO veidc@localhost IDENTIFIED BY 'veidc.com';
- FLUSH PRIVILEGES;
- quit
然后是下载并安装PHPMyAdmin了,使用以下命令:
- cd /usr/local/lsws/Example/html
- wget https://files.phpmyadmin.net/phpMyAdmin/4.9.7/phpMyAdmin-4.9.7-all-languages.zip
- #apt install unzip 或 yum install unzip
- unzip phpMyAdmin-4.9.7-all-languages.zip
- mv phpMyAdmin-4.9.7-all-languages phpmyadmin
现在打开地址:http://server_IP:8088/phpmyadmin/index.php,你就可以看到PHPMyAdmin管理界面了。